
Introduction
Interior scanning used to be a time-consuming task, often involving tape measures, notepads, and multiple site visits. Today, laser measuring tools make the process faster, more accurate, and easier for professionals and DIY enthusiasts alike. With the right approach, you can create precise floor plans and room layouts without the complexity of full 3D scanning.
Step 1: Choose the Right Laser Measuring Tool
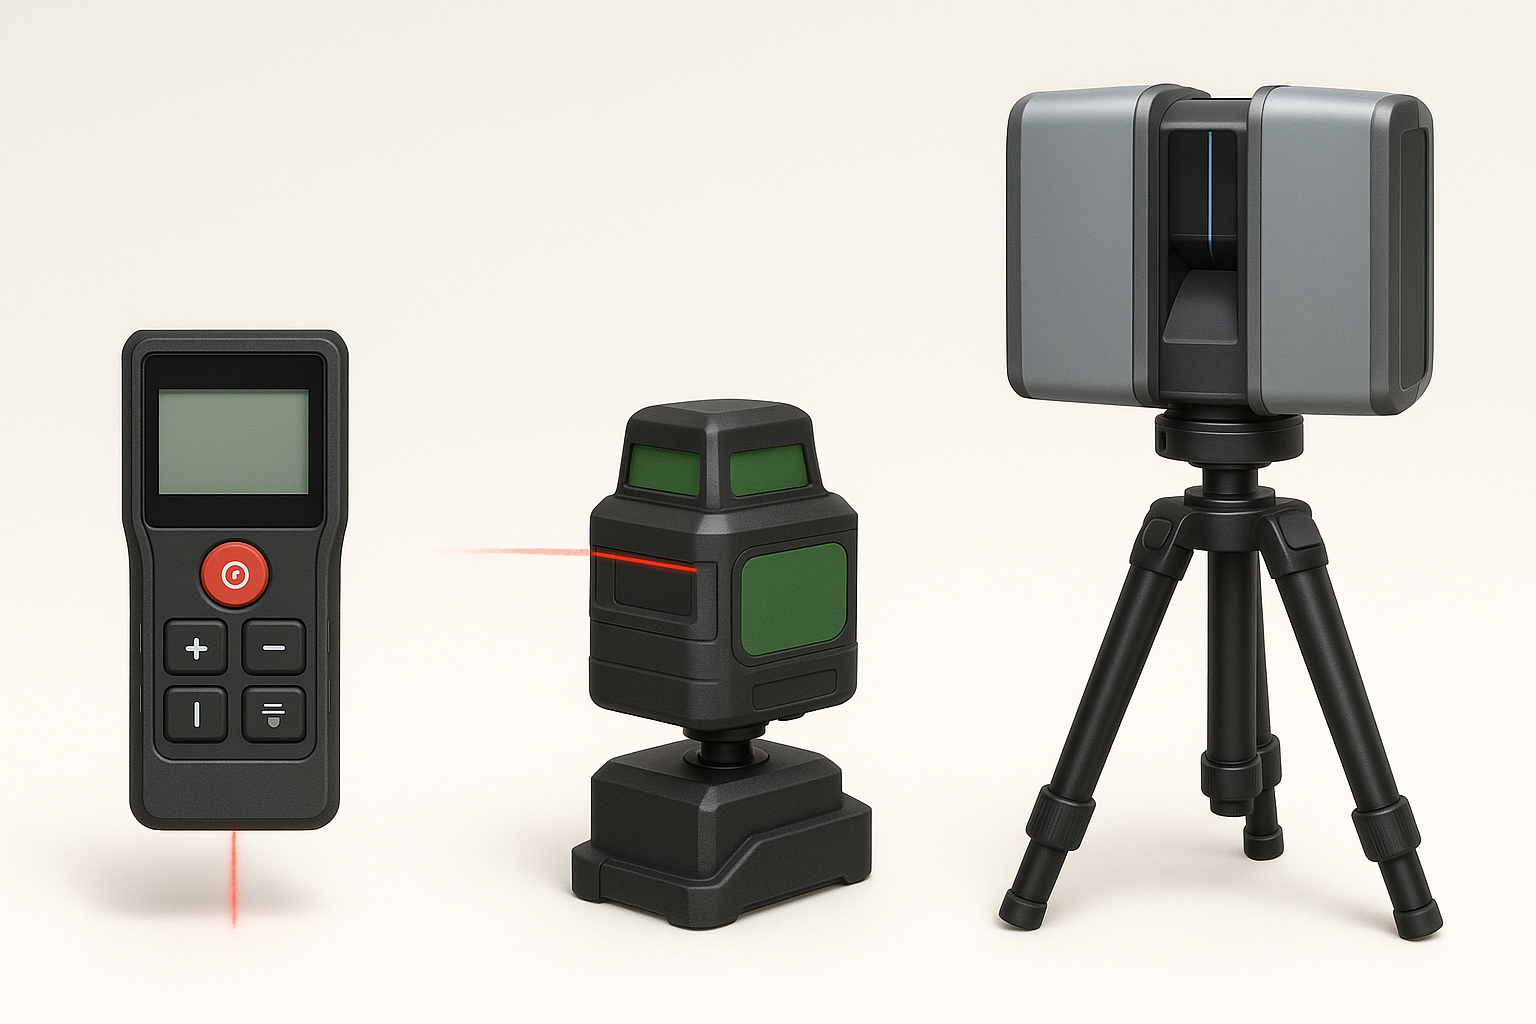
Not all devices are created equal. For interior scanning, consider:
1D laser distance meters for quick single measurements.
2D laser scanners for complete floor plans and wall angles in one pass.
3D scanners for complex, high-detail projects (but note the higher cost and learning curve).
For most room layouts, a 2D laser measuring device offers the best balance between speed, accuracy, and cost.
Step 2: Prepare the Space
Before scanning:
Clear obstacles where possible to improve line of sight.
Open doors to adjacent rooms if you want to capture connected layouts.
Note any areas that may require manual measurement (niches, stairs, or obstructed corners).
Step 3: Position and Scan
Place the laser measuring tool in a central location or where it can capture the largest portion of the room.
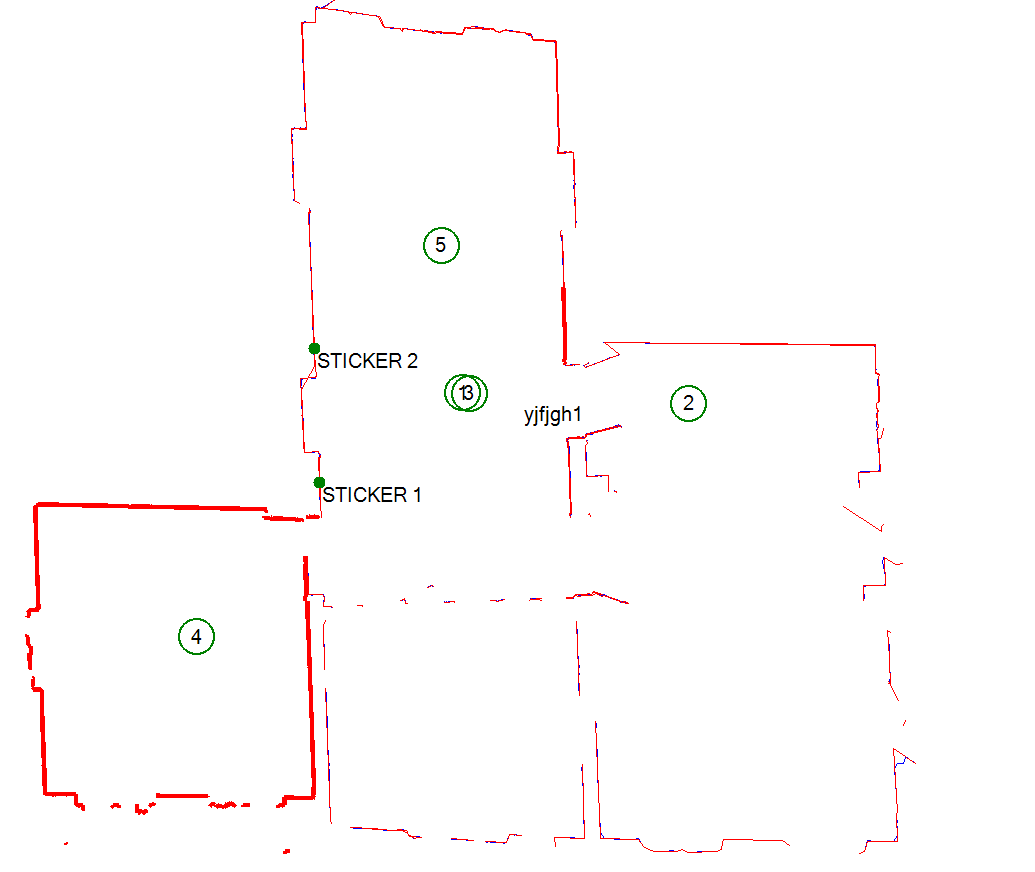
For 2D scanning, the device will rotate and record distances and angles in a single plane, building an accurate map of the floor layout.
Follow the device’s prompts or instructions to complete the scan.
Tip: Keep the device stable during the scan for maximum accuracy.
Step 4: Review and Save Your Data
Most modern laser measuring tools allow you to:
View the scanned floor plan immediately.
Export data to CAD software for editing.
Save results in multiple formats (DXF, PDF, PNG) for easy sharing.
Step 5: Use Your Interior Scan
Your scan can be used for:
Architectural planning
Kitchen or carpentry projects
Renovations and fit-outs
Real estate listings
Accurate interior scanning means fewer surprises on-site and a smoother workflow from planning to execution.
Conclusion
Laser measuring tools have made interior scanning accessible to everyone, from architects and engineers to homeowners. By choosing the right device and following a simple process, you can achieve professional-grade floor plans without the complexity or cost of full 3D scanning.
While 3D systems are the most precise, they produce extremely large files, are often heavy and expensive, and require extensive post-processing before the data can be used. In most interior scanning projects, the essential information is 2D, not 3D.
At 2Dscanner, we share this vision of practical 2D scanning — faster, precise, and accurate, delivering exactly what you need without unnecessary complexity. Choose wisely, and let your tools match the real needs of the job. Learn more by reading our detailed documentation. Explore our Youtube channel where we show detailed interior scanning examples and we also have a link in order to download the files and check by yourself the results.